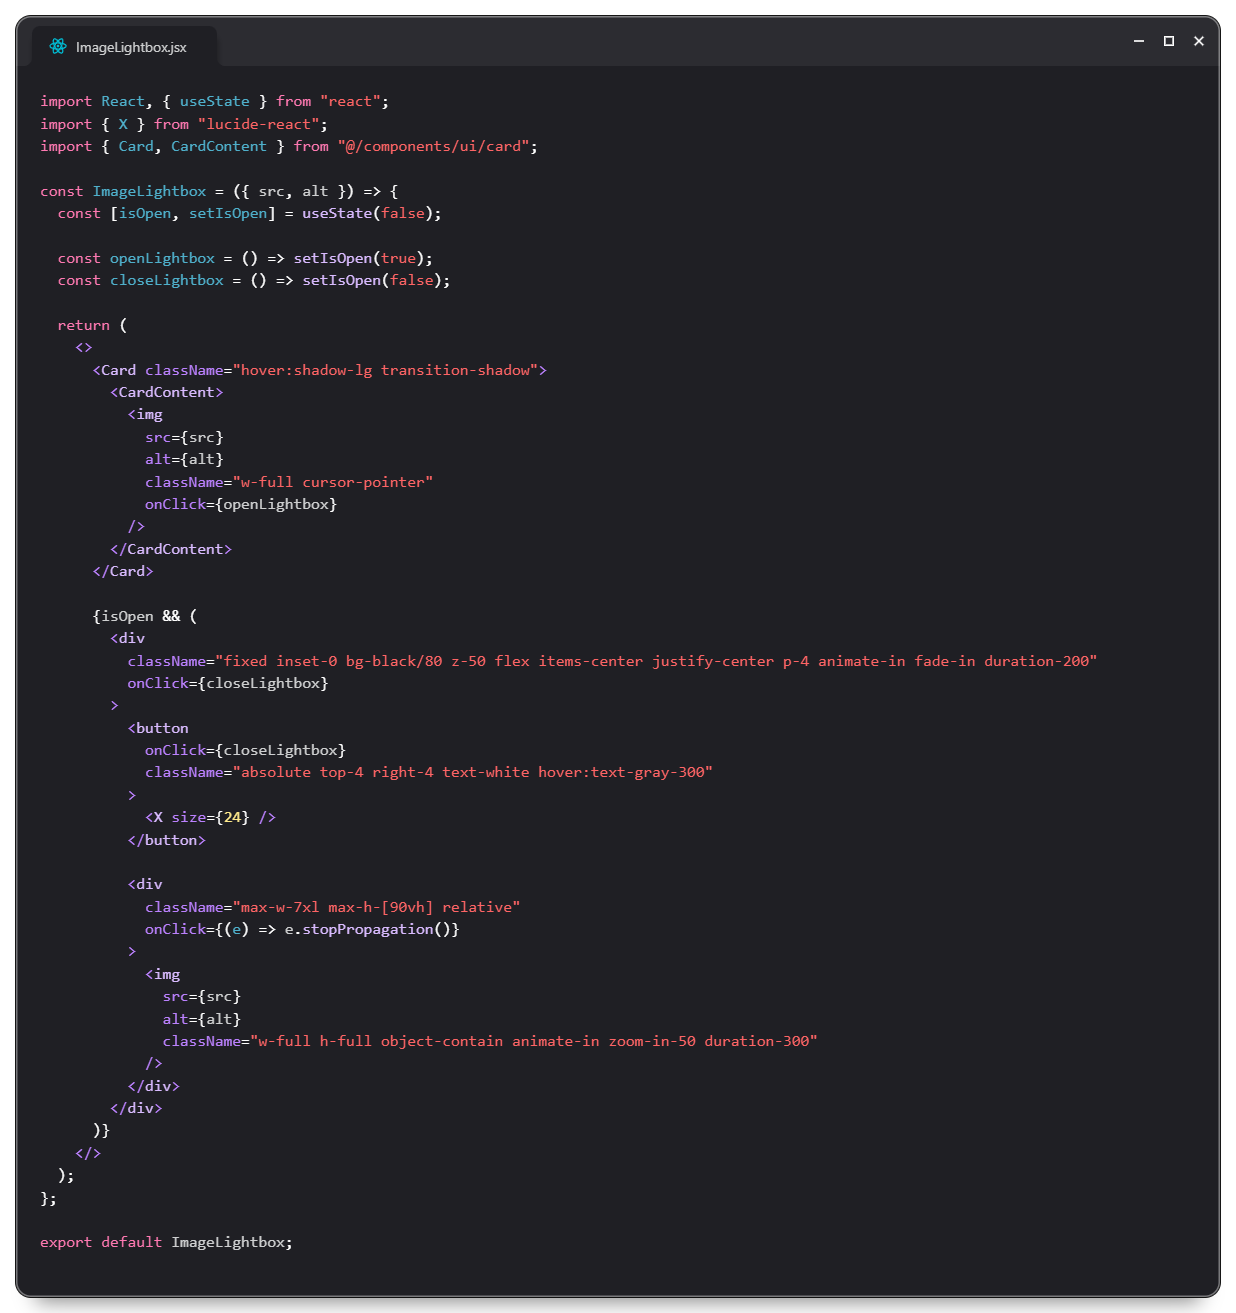
How to make an image lightbox for Nextjs
I built a lightbox component that I drop into any React or Nextjs project.
No libraries. Fully responsive.
What You’ll Need
Before you start coding, let’s set up the required packages. In your Next.js project, run these commands in your terminal:
If you’re using the shadcn/ui card component, you’ll need to install it first:
Make sure you have Tailwind CSS set up in your project. If you don’t, you can add it by running:
Building the lightbox
Here’s how to make a lightbox component. We’ll use React hooks to control it and Tailwind CSS to make it look nice.
Step 1: Make the basic component
Step 2: Add it to your page
How it works
This lightbox does a few key things:
- Uses React’s useState to control when it’s open or closed
- Closes when you click outside the image
- Fades in smoothly when opening
- Fits different screen sizes
- Keeps image quality and shape intact
Making it better
Here are some cool features you can add:
1. Arrows to move between multiple images:
2. Keyboard controls to close with the Escape key:
3. Loading spinner while images load:
Tips for better perfomance
A few things to keep in mind:
- Use Next.js Image component to make images load faster
- Only load big images when needed
- Keep animations simple and smooth
- Test on phones and computers
- Have a backup plan if images don’t load
- Make sure people can use it with a keyboard


